|
vdview Boundary marking
This section will show you how to mark the boundary of a 3D region of interest
(ROI) in an image.
You will need to mark the boundary of the ROI for each
image containing the ROI. The tools for the boundary tools are
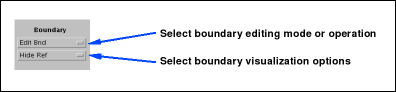
in the Boundary section of the control panel.
Creating a Boundary
Select a slice that contains the ROI and make sure that the focal point is
on the ROI. The following procedure is used to create a ROI boundary
from scratch.
- Zoom In until the ROI fills most of the image area.
- Select Edit Bnd in the topmost Boundary drop-down
menu or press the Edit button in the Edit Commands
section of the Annotation area. The drop-down menu should be
surrounded now by a red border, indicating that it is the active tool.
- Place the cursor on the boundary of the ROI.
- Click the mouse button to start a new boundary on this image.
The first point of a boundary appears in a different shade than
all the other points (and behaves differently when the boundary
is closed and it gets deleted)
- Append points to the boundary by clicking around the ROI
(taking care that no already drawn segment gets highlighted). With
each click, a new point will be appended to the boundary after the
last point.
- Click on the starting point to close the boundary.
- At any time, you can undo the last action or go back and edit the
existing points.
Editing a Boundary
There are two ways to edit the points of the boundary. The first method is to
use the Edit Bnd (Edit Boundary) tool.
- Select Edit Bnd from the drop-down Boundary menu or
press the Edit button in the Edit Commands section of
the Annotation area.
- To move a point, click on a point and drag it to the new location.
- To insert a point, place the cursor over or near a line to get it
highlighted. Press the mouse button to insert a new point. Before
releasing the mouse button, you can drag the point to the desired location.
- To remove a point, place the mouse over a point. The
selected point will become highlighted. Double click the mouse button
to remove the selected point. Alternatively, you may single click
while holding down the Ctrl key. There is one exception; if you
delete the first point of a closed boundary, the boundary will turn open
instead of removing its first point.
- To start a new boundary, hold down the Shift key
while clicking the mouse on the location of the new boundary.
- If you make a mistake, click on the Undo button to reverse the
most recent changes.
The second method of editing the points of the boundary is to use the Nudging
tool.
- Select Nudge Bnd (Nudge Boundary) from the Boundary
drop-down menu.
- Move the cursor over the drawn boundary. There will be a circle around
the cursor and any points within the circle will become highlighted.
- Place the cursor so that a few highlighted points are near the edge of
the circle.
- Click the mouse button, and the points will be moved to the edge of the
circle.
- Press the mouse button and drag the mouse, and the
points will be pushed along the edge of the circle.
- To resize the nudging circle, hold the Shift key and drag
the mouse until the circle is the desired size.
- Hold the Ctrl key and drag the mouse to set the "Arc" nudger.
This is an arc of a circle that can push points to the edge of the arc.
- Click and drag the mouse to nudge points (same as the circular nudger).
You can use the "e" key to cycle between the two different boundary editing
modes.
Save the Region Boundary
To save the ROI boundary to the server, press the Save As
button in the Annotation Commands section of the
Annotation area. You will be asked to set the annotation title
and to click again the Save As button until the boundary is
saved.
It is possible to store additional comments about the ROI or ROI
boundary by writing them in the comments section of the Annotation
area.
If changes are made to a boundary or to its comments field, the
boundary can be saved again by pressing the Save button.
|